You can create a class and add students manually with a link, or connect your LMS account to Wayground to bring classes and students in automatically.
Note: Integrating with LMSs (apart from Google Classroom and MS Teams) is available for Wayground Schools & Districts Plans.
Create a Wayground Class and add/remove students
- 1. Click on the 'Classes' tab on the left navigation pane
- 2. Now, click on the 'Create a class'
- 1. If you're creating your first class, click on 'Add manually'
- 3. Enter a class name and tag a class color code
- 4. Check the box for 'Require students to enter a guardian's email address' or uncheck it if it is not required

- 5. Now, a link will be created. Share this link with students to help them join this particular class. A specific class code will also be generated for the class that you can share with your students.
- 1. All students can join the class via wayground.com/join/class and enter the code. This code is valid for up to 14 days
- 2. If new or additional students need to be added to the same class after 14 days, select the desired class, then click on 'Add Student'. Finally, click on 'Click here to generate new code', and a new link and code will be generated, which you can share with the students you want to add to your class

Once your students have the link, they will be prompted to log in to Wayground (if they haven't already done so) and must accept the invite to join the class.
You can then,
- 1. Check the number of students who have joined the class by clicking on the relevant class within Classes
- 2. Remove a student from a class by clicking on the trash icon (
 ) placed next to a student's name, and then confirming the action by clicking on the 'Remove' button
 - 3. Assign a live or homework session to this class
Note: You can also import classes from your desired LMS accounts like MS Teams, Schoology, Google Classroom, Canvas, Clever, ClassLink, etc. To learn how, go to the 'Classes and Integrations' section on our Help Center.
Assign a session to a Wayground Class
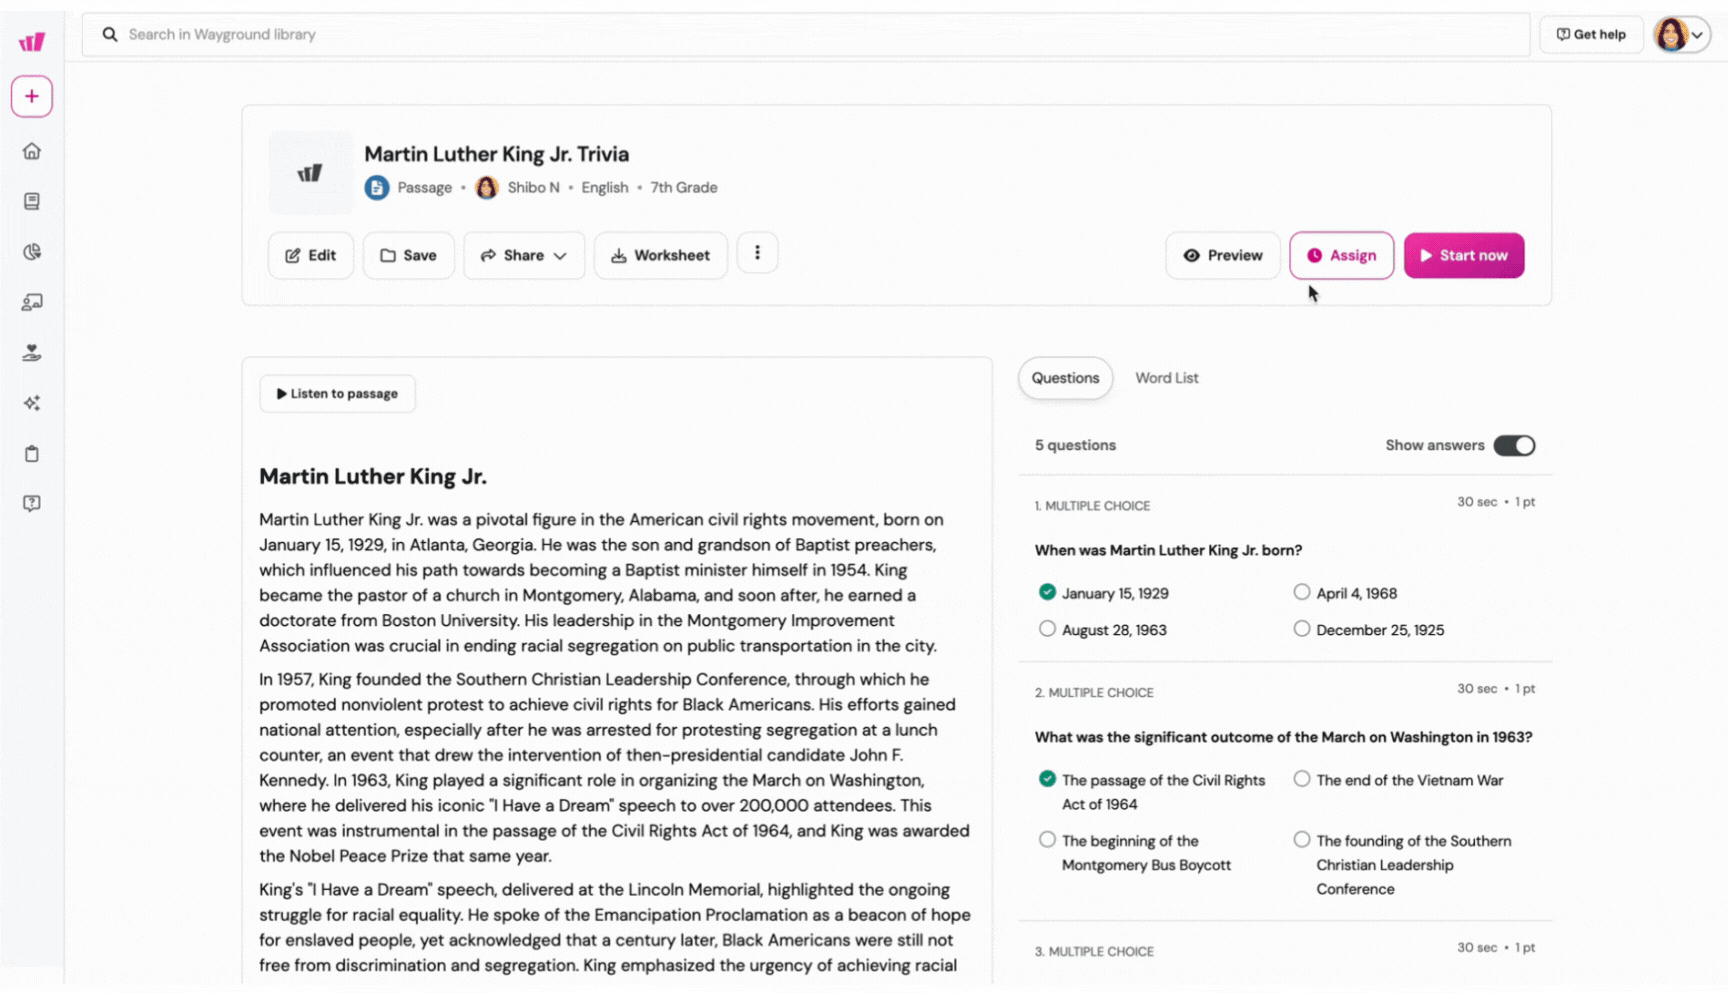
Prerequisite: Use ready-made resources from the Wayground library or modify a resource to match your requirements. You can also create a resource from scratch or use Wayground AI to generate one.
- 1. Select a resource
- 2. Click on 'Start now' to start a live session, or click on 'Assign' to assign as homework
- 3. On the settings page, scroll down and click on 'Select a class'
- 4. Select the required class
- 1. You can click on the 'Pick specific students' option to assign the resource to selected students
- 2. You can also enable Accommodations by checking the 'Set up Accommodations' option
- 5. Click on 'Next'
- 6. Name the assignment and describe the assignment if required, then click on 'Next'
- 7. Customize the remaining session settings
- 8. Click on 'Start' or 'Assign'
Was this article helpful?
That’s Great!
Thank you for your feedback
Sorry! We couldn't be helpful
Thank you for your feedback
Feedback sent
We appreciate your effort and will try to fix the article